Naturally Dyed Eggs | Top 10 Easter Craft Ideas
Easter is one of my favorite holidays! First, because it brings all the family together. Second, because it remarks the beginning of the spring. Third, because I love all of the Easter decoration and eggs dying process. There is an enormous amount of ideas on how to actually dye the Easter eggs and to decorate our homes. But this year I will share my 2016 top 10 Easter craft ideas that will bring the Easter spirit at my home.
So,starting with the obvious…. 🙂
Coloring eggs is a must. If you don’t want to use artificial dyes, there are several options for preparing naturally dyed eggs with completely natural paints. Use the gifts of nature, just as our ancestors did in the past.
Compared with the standard colorings for eggs, those obtained by natural products are more delicate and less saturated. But the paintings are absolutely harmless, and the colored eggs look somehow gentle and fresh. Just as it is the spring.

I admit, this method looks a bit more difficult and time-consuming, but for the sake of my family’s health, I’ve decided to give a try this year. Instead of tossing some leftovers, I will use them to naturally dye the Easter eggs. You might be surprised by how various possibilities I’ve found on the web for creating eco-friendly colorings that give the kitchen (and not only) leftovers a second use — and cost basically nothing to make.
How to prepare the naturally dyed eggs for Easter in easy steps?
- Choose white eggs. Wash well with a small sponge, warm water, and baking soda to rub seals.
- Put the natural products in separate small saucepans and add water in each one of them.
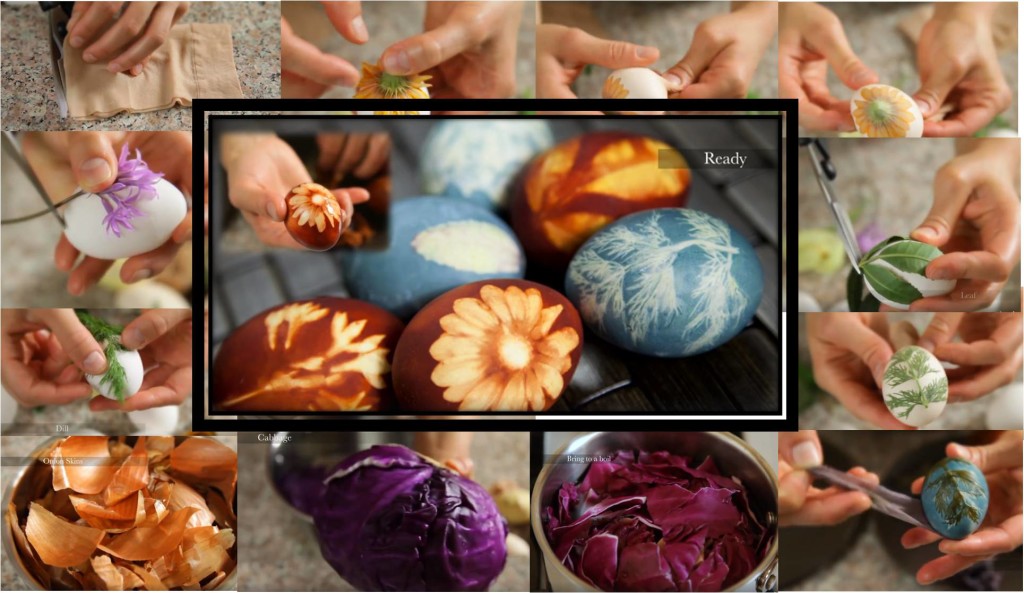
- Pick up flowers and leaves to form a composition on the eggs. You can use daisies, chrysanthemums and other smaller flowers, fern leaf, thyme, dill and whatever you have in the backyard.
- Carefully put the egg in a piece of nylon stockings and make a tight knot (or simply use rubber bands or string).
- Place the packed eggs in the coloring mixtures. Put to boil and simmer for 10-20 minutes.
- Allow the mixtures to cool down together with the eggs inside.
- Then put in the refrigerator for a couple of hours (best results after 5 to 12 hours)
- Once removed from the dyes, dry the eggs by gently patting with paper towels.
- Unpack carefully.
- Use a cotton pad, soaked with a few drops of sunflower or olive oil to polish the eggs and make them look glossy.
How to prepare the natural colors?
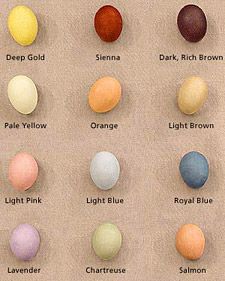
Here is some useful information about how to get the natural colors:
• Blue – canned cranberries, cooked leaves of red cabbage, dark red grape juice.
• Brown or beige – strong or instant coffee, black walnut shells (cooked), black tea;
• Golden brown – fennel seeds;
• Orange-brown – chili powder;
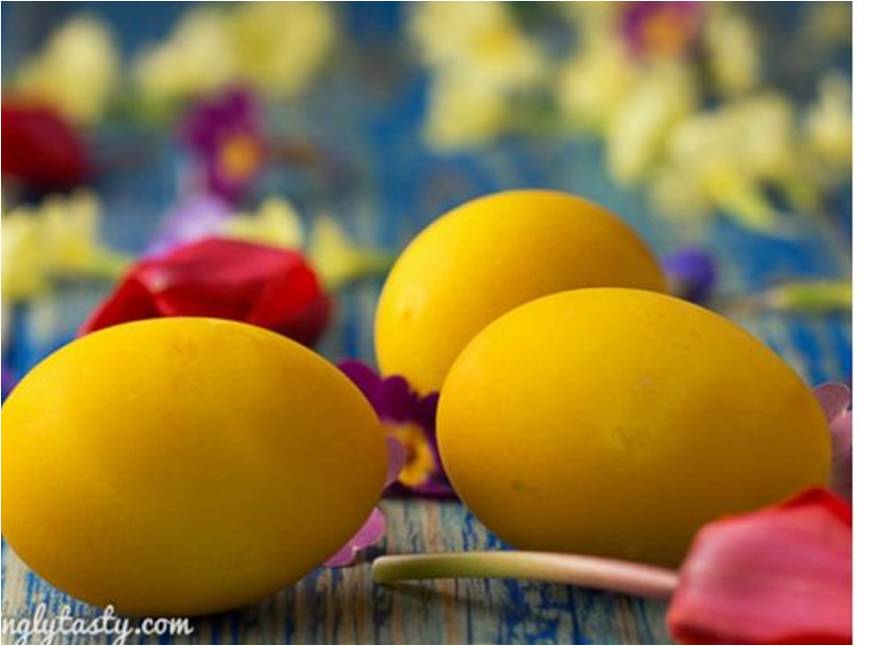
• Gold – turmeric;
• Green – spinach (cooked).
•Lavender – a small amount of purple grape juice, violet colors plus 2 tablespoons lemon juice;
• Orange – onions peel (cooked), carrots, red pepper;
• Pink – beets, cranberries, frozen raspberries, red grape juice
• Red – pomegranate juice, canned cherries with juice, raspberries, cranberries, a large quantity of skins of red onions (cooked). 3 canned beets in cranberry juice will do a good job;
• Violet – red wine, a little red onion peelings (cooked);
• Yellow – peel from lemon and orange (cooked), chamomile or green tea, powdered turmeric (boiled) (3 tablespoons) or saffron. For intense yellow – vitamin C powder.
Watch the full video tutorial here:
There’s no need to buy another box of artificial dyes when Mother Nature’s own colorful palate is right here. And there’s nothing better than nature! Wish you luck with these beautiful naturally dyed eggs this Easter! promise to share my results soon 🙂
Hugs,
Annie
p.s. Don’t forget, Sunday 27th March is Easter Sunday!


